In this post, you will learn more about Azure Service Bus with .NET Core. It’s is a general-purpose development platform supported by Microsoft and the .NET community on GitHub. It is a cross-platform which supports Windows, macOS, and Linux, and can be used in device, cloud, and embedded/IoT scenarios. Microsoft Azure Service Bus provides a reliable information delivery service. The main purpose of this service is to make communication easier and when two or more parties want to exchange information, they need a communication facilitator.
Prerequisites
- .NET Core
- An Azure subscription.
- A Service Bus namespace
- A Service Bus Queue
Create a Service Bus Namespace and Queue in the portal
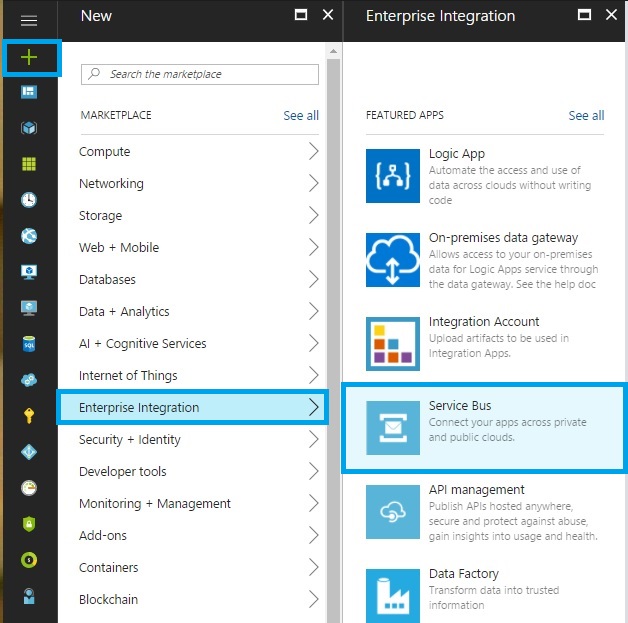
Log into the Azure portal. Click “+NEW” and choose “Enterprise Integration”. Select “Service Bus”.
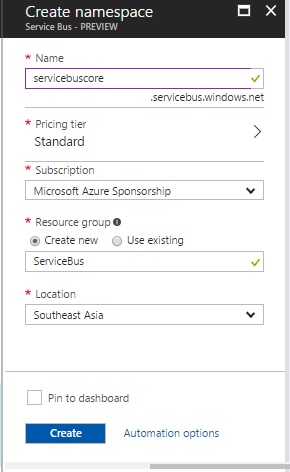
In the ‘Create Namespace’ blade enter the details for the creation of service bus namespace.
- Name: Unique namespace for Service Bus
- Pricing Tier: Select ‘Standard’
- Subscription: Select the appropriate subscription from the list.
- Resource Group: Select ‘Use Existing’ and enter the ‘Resource group’ name.
- Location: Select the nearest location. Click Create.
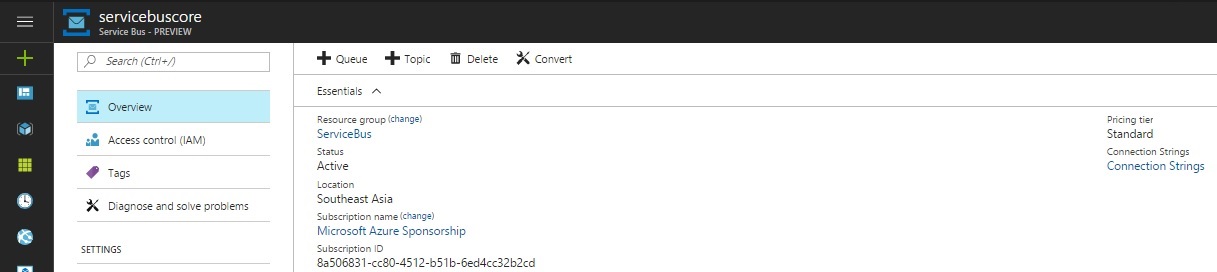
Once the ‘Service Bus deployment successful’ notification is received, Click on ‘Service Bus namespace’ object.
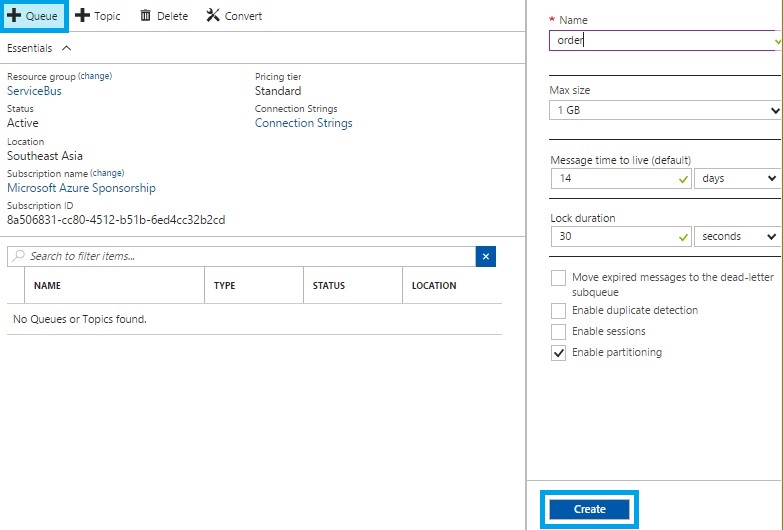
Click on ‘Add Queue’. On ‘Create queue’ blade enter the queue name. Select default values and click on ‘Create’.
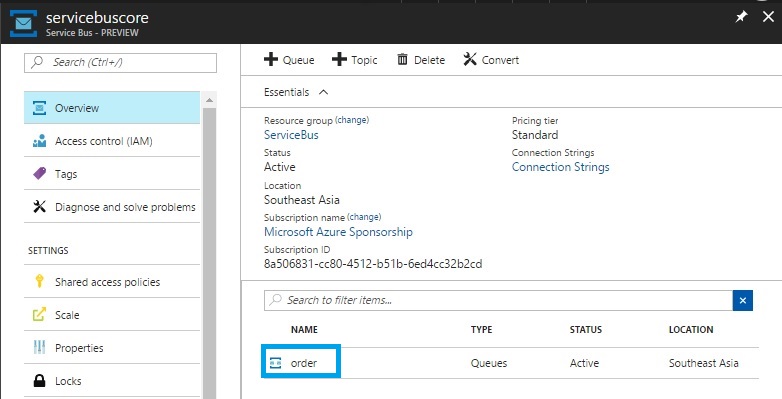
Once the queue is created, it should be visible in the ‘Service Bus namespace’ blade.
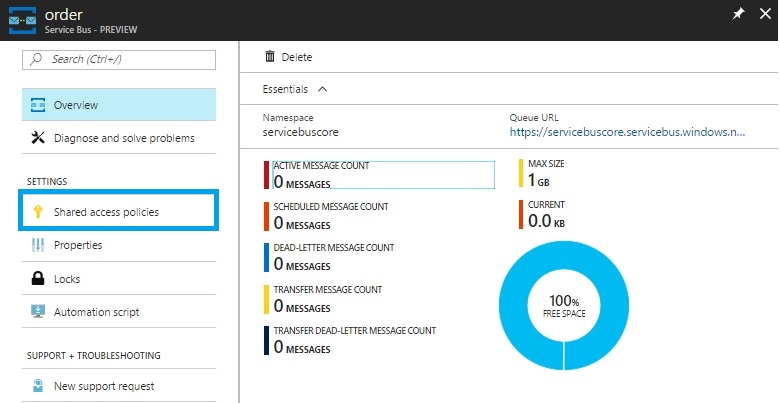
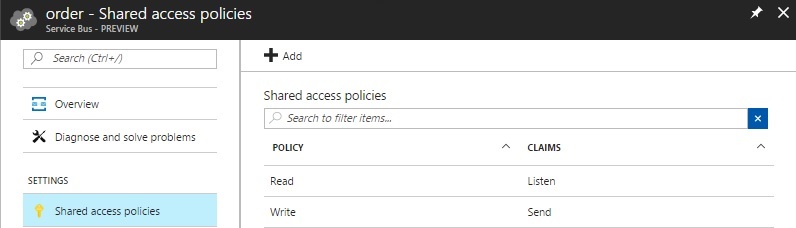
Click on queue ‘Orders’. In the Setting pane for queue ‘Orders’, click on ‘Shared access policies’.
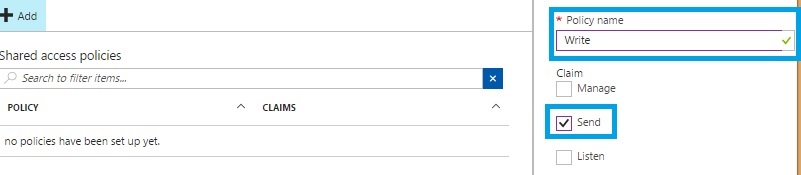
Click on ‘Add’ in ‘Shared access policies’ blade. Enter Policy name ‘write’ and select the claim ‘Send’
Repeat the previous step to create policy ‘read’ with claim ‘Listen’.

Both policies i.e. ‘read’ and ‘write’ should be visible in ‘Shared access policies’ blade.
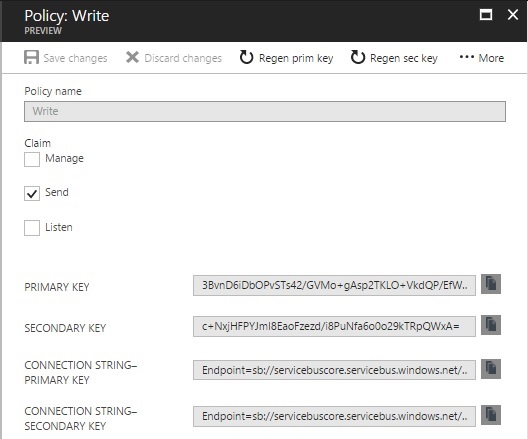
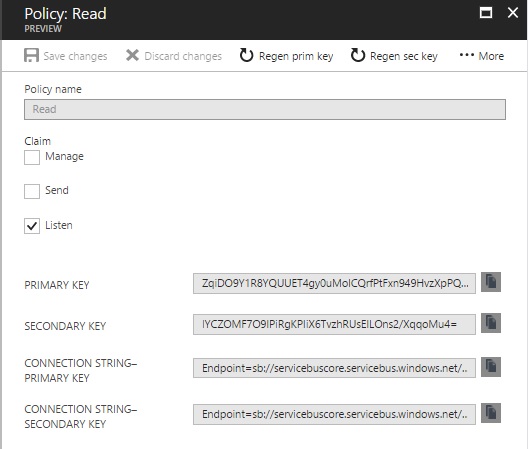
Click on copy and note the Primary key associated with Shared access policies ‘read’ and ‘write’.
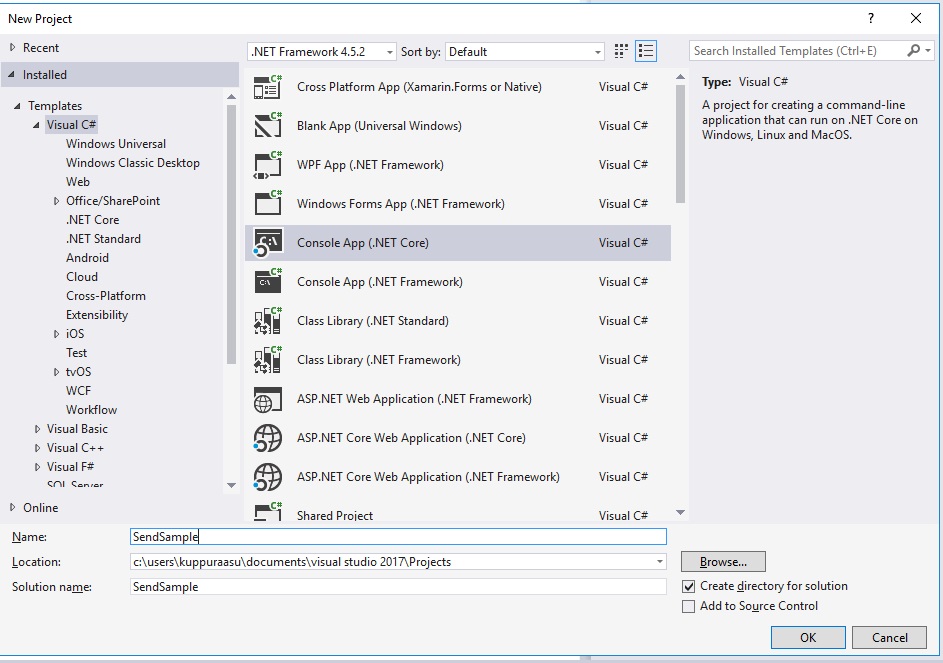
Create a new .NET Core project
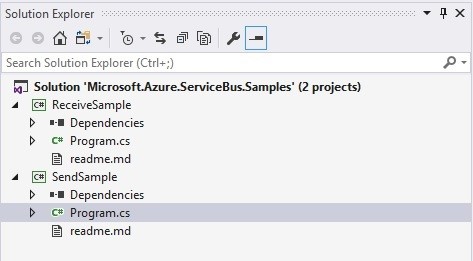
Now we need to create two new projects to send and receive messages.
- SendSample
- ReceiveSample
SendSample Project
In Visual Studio, click on File / New / Project and select the project template Visual C# / .NET Core / Console App (.NET Core).
Add the Service Bus NuGet package
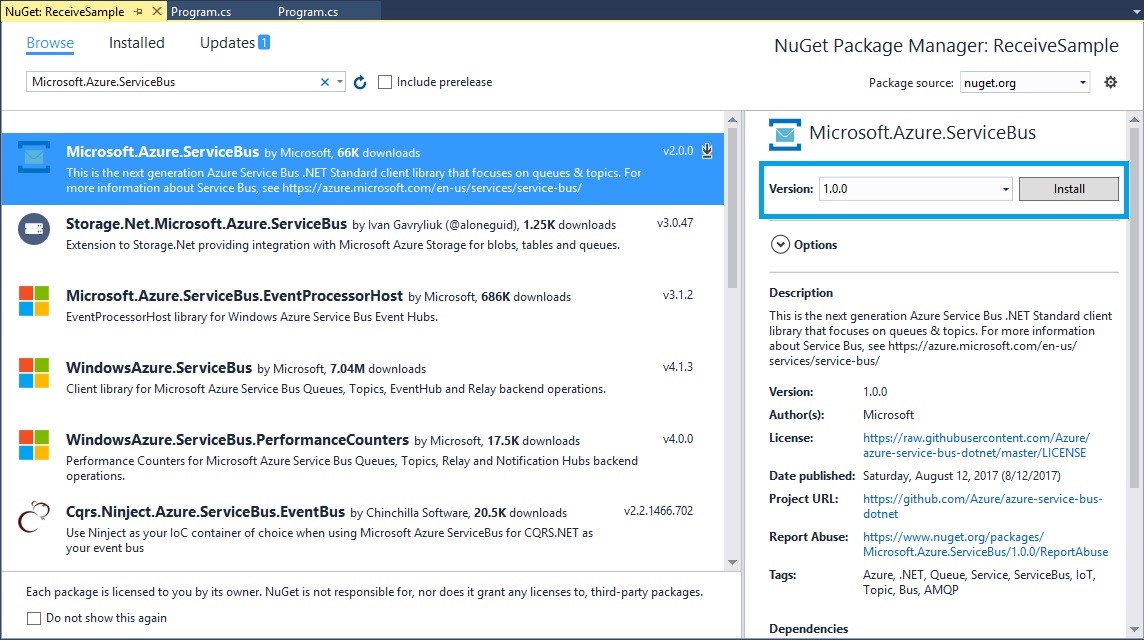
In Solution Explorer, in the Project Name, right-click References, then click Manage NuGet Packages. Click the Browse tab, then search for Microsoft.Azure.ServiceBus. Select Microsoft.Azure.ServiceBus package, click Install and accept the terms of use.
Add the following using statement to the top of the Program.cs file.
using Microsoft.ServiceBus.Messaging;
Add the following code to the Program Class. Set the ServiceBusConnectionString variable to the connection string that was obtained when creating the namespace, and set QueueName to the queue name that you used when creating the queue.
 public class Program
    {
        private static IQueueClient queueClient;
        private const string ServiceBusConnectionString = " {Service Bus connection string}";
        private const string QueueName = " {Queue path/name}";

        public static void Main(string[] args)
        {
            MainAsync(args).GetAwaiter().GetResult();
        }

        private static async Task MainAsync(string[] args)
        {
            queueClient = new QueueClient(ServiceBusConnectionString, QueueName, ReceiveMode.PeekLock);

            await SendMessagesToQueue(10);

            // Close the client after the ReceiveMessages method has exited.
            await queueClient.CloseAsync();

            Console.WriteLine("Press any key to exit.");
            Console.ReadLine();
        }

        // Creates a Queue client and sends 10 messages to the queue.
        private static async Task SendMessagesToQueue(int numMessagesToSend)
        {
            for (var i = 0; i < numMessagesToSend; i++)
            {
                try
                {
                    // Create a new brokered message to send to the queue
                    var message = new Message(Encoding.UTF8.GetBytes($"Message {i}"));

                    // Write the body of the message to the console
                    Console.WriteLine($"Sending message: {Encoding.UTF8.GetString(message.Body)}");

                    // Send the message to the queue
                    await queueClient.SendAsync(message);
                }
                catch (Exception exception)
                {
                    Console.WriteLine($"{DateTime.Now} > Exception: {exception.Message}");
                }

                // Delay by 10 milliseconds so that the console can keep up
                await Task.Delay(10);
            }

            Console.WriteLine($"{numMessagesToSend} messages sent.");
        }
    }
ReceiveSample Project
To receive the messages you just sent, create a ReceiveSample Project and add a reference to the Service Bus NuGet package, similar to the previous sender Project.
Add the following using statement to the top of the Program.cs file.
using Microsoft.ServiceBus.Messaging;
Add the following code to the Program Class. Set the ServiceBusConnectionString variable to the connection string that was obtained when creating the namespace, and set QueueName to the queue name that you used when creating the queue.
public class Program
    {
        private static IQueueClient queueClient;
        private const string ServiceBusConnectionString = " {Service Bus connection string}";
        private const string QueueName = " {Queue path/name}";

        public static void Main(string[] args)
        {
            MainAsync().GetAwaiter().GetResult();
        }

        private static async Task MainAsync()
        {
            queueClient = new QueueClient(ServiceBusConnectionString, QueueName, ReceiveMode.PeekLock);

            Console.WriteLine("Press ctrl-c to stop receiving messages.");

            ReceiveMessages();

            Console.ReadKey();
            // Close the client after the ReceiveMessages method has exited.
            await queueClient.CloseAsync();
        }

        // Receives messages from the queue in a loop
        private static void ReceiveMessages()
        {
            try
            {
                // Register a OnMessage callback
                queueClient.RegisterMessageHandler(
                    async (message, token) =>
                    {
                        // Process the message
                        Console.WriteLine($"Received message: SequenceNumber:{message.SystemProperties.SequenceNumber} Body:{Encoding.UTF8.GetString(message.Body)}");

                        // Complete the message so that it is not received again.
                        // This can be done only if the queueClient is opened in ReceiveMode.PeekLock mode.
                        await queueClient.CompleteAsync(message.SystemProperties.LockToken);
                    },
                    new MessageHandlerOptions(exceptionReceivedEventArgs =>
                    {
                        Console.WriteLine($"Message handler encountered an exception {exceptionReceivedEventArgs.Exception}.");
                        return Task.CompletedTask;
                    })
                    { MaxConcurrentCalls = 1, AutoComplete = false });            }
            catch (Exception exception)
            {
                Console.WriteLine($"{DateTime.Now} > Exception: {exception.Message}");
            }
        }
    }
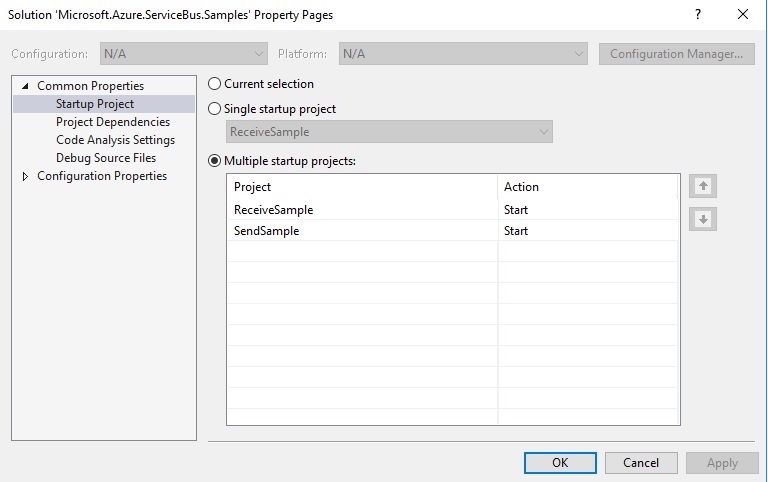
In the Solution Explorer window, right-click the solution and choose Properties. In the property page that comes up, click on Startup Project and then choose Multiple startup projects: and change the Action for both queue projects to “Start”. Then click OK.
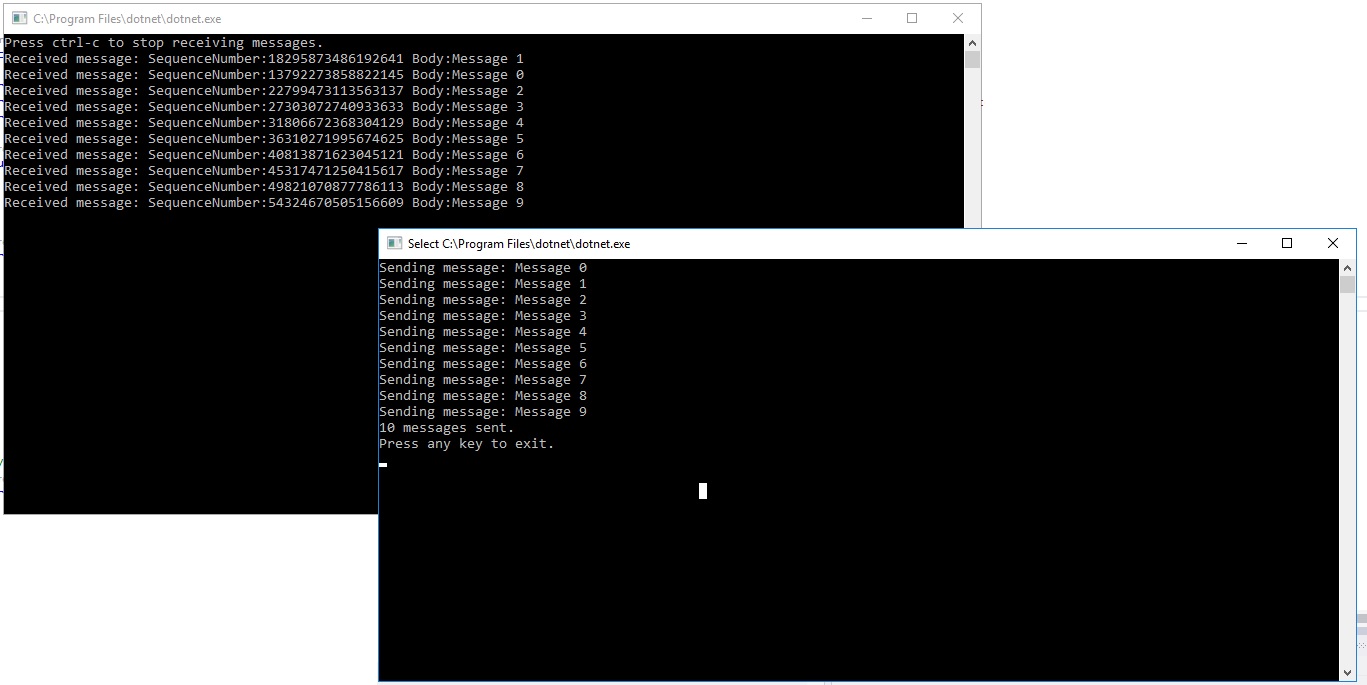
In Visual Studio, click the Start button on the menu bar.

Now we can see two running console windows that should be showing some output.
Strengthen your Azure Service Bus monitoring, and get powerful toolsets and actionable insights to troubleshoot messaging issues with the help of Turbo360.
Conclusion
To end with a quick recap. this blog helps you to send and receive messages through Queues using .NET Core. Also, you can use Azure Service Bus on multiple platforms like Windows, macOS, and Linux with ease!