Introduction
A piece of code can be executed easily in any application based on the requests made by the end user. But often there is a need to run some tasks in background at a regular interval, without an user triggering the request. There are many ways to accomplish this, but here is a reliable solution to perform scheduled execution of a task.
Azure Scheduler Service
Azure Scheduler is a service provided by Microsoft Azure, which allows to scheduled jobs that invokes requests to HTTP/S endpoints or posts messages to Azure Service Bus queues and topic. 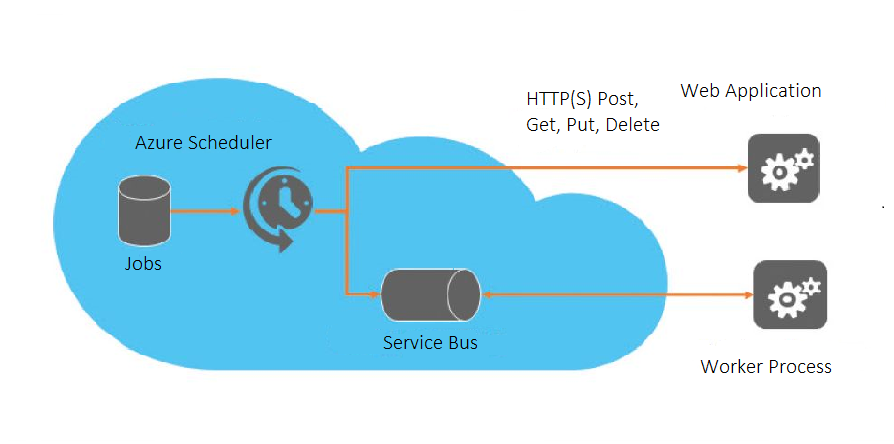 Many jobs can be created under the Azure Scheduler, which schedules independently. The different options under the scheduler jobs are:
- Invoking Http/Https endpoints (Methods may be GET, PUT, POST, DELETE)
- Sending message to Azure Service Bus Queues
- Sending message to Azure Service Bus Topics
- Sending message to Azure Storage Queues
All these can be achieved by different jobs created under a single Scheduler.
Using Service Bus messages as a trigger
Sending messages to a Service Bus queue at regular interval doesn’t makes any sense in accomplishing background tasks in applications. Here is a way to use this to trigger something which can complete the background tasks.
Azure Cloud Services
Azure provides cloud services for running powerful applications or services in the Azure cloud. Worker Roles and Web Roles manage the applications. Worker Roles are being used to run background processes of large scale applications. Here, the Service Bus messages can be used as a trigger for performing something in the Worker Role.
A scheduler job should be created in a way that it sends a message to a Service Bus entity at regular intervals. If a chunk of code inside the worker role must be executed at regular intervals, the worker role should watch the Service Bus entity which is configured with the scheduler job. Whenever the Service Bus entity gets a message, the worker role should read the message and start running the code that needs to be executed at the regular intervals.
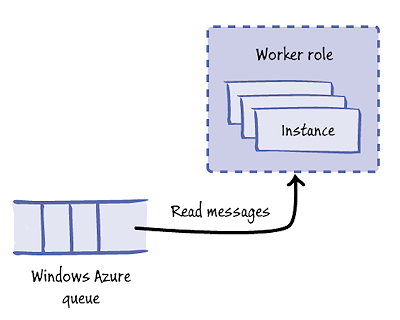
The scheduler job keeps sending the messages to the Service Bus entity and the worker role keeps receiving the messages and trigger the required operation. Thus, the Service Bus messages and a scheduler are used as a trigger in a worker role.
Creating Azure Scheduler
Follow these simple steps to create a scheduler in the New Azure Portal.
Click New -> Everything -> Scheduler -> Create
A blade with the details of scheduler is opened.

After providing the name and the subscription under which the scheduler should be created, the scheduler job should be created by clicking the “Configure” in “Job collection”.
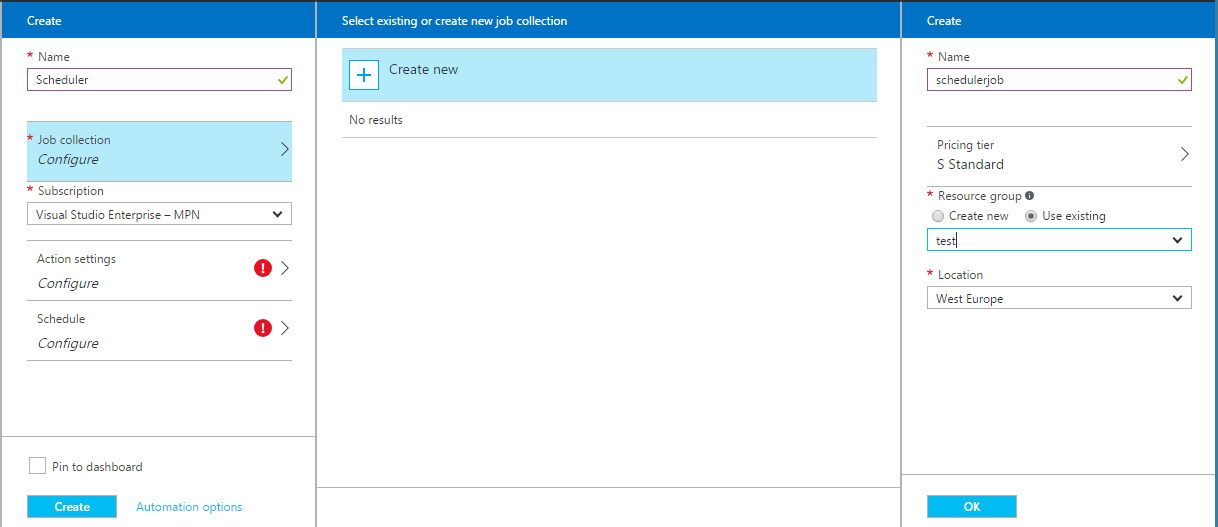
Here, basic details such as the name of the scheduler job, the pricing tier in which the job should be created and the resource group should be provided, next click “OK” to proceed.
The two important configurations to be provided while creating the scheduler are the Action settings and the Schedule option. By clicking the “Configure” in Action settings, the action to be performed by the scheduler can be configured.
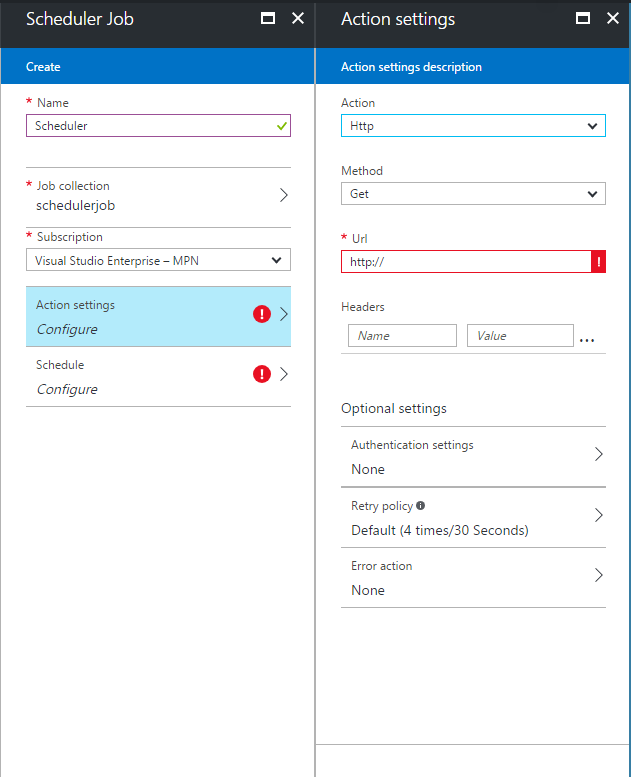
The Action settings description blade contains the details of the scheduler job. There are 5 different Actions that can be done using the scheduler, see the below picture.
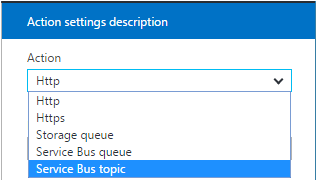
The scheduler job can schedule an action on these options. Three of them for posting messages and the remaining two for hitting endpoints.
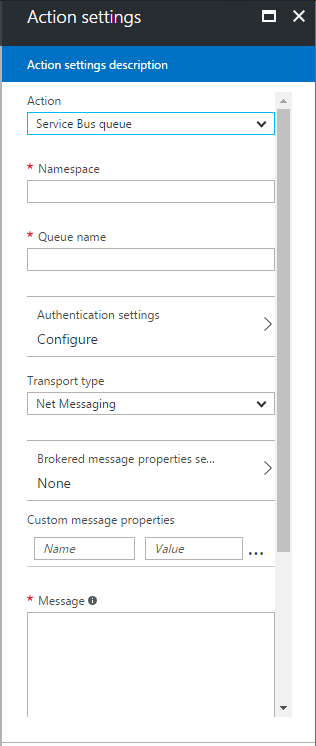
By choosing the Service Bus queues, the following details should be provided:
- Namespace – name of the Service Bus namespace which contains the queue
- Queue name – name of the queue, to which the message should be posted
- Authentication settings – the shared access key (primary or secondary) for connecting the queue
- Transport type – Net Messaging or AMQP
- Brokered message properties – properties of the messages posted by scheduler
- Custom message properties – any custom properties that the message should contain
- Message – the content to be posted
The other important part is providing the Schedule configurations, i.e. the frequency by which the scheduler performs the action and the start and end time.

After the configurations are entered, the “Create” button is clicked to create and deploy the scheduler.
Conclusion
Once the scheduler is published successfully, the scheduler job posts messages to the Service Bus queue at configured intervals. Whenever the queue receives a new message, the worker role reads the message and executes the chunk of code. Thus, the reliable scheduling is achieved using the Azure Scheduler and Service Bus Queue.