Azure Functions offers a serverless solution that streamlines the development process, minimizes infrastructure overhead, and results in cost savings. The beauty of this approach is that you no longer need to grapple with server deployment and maintenance; the cloud infrastructure automatically furnishes the essential resources to support your applications.
When considering the ways in which we can create an Azure Function, we have several options:
- You can create a Function App in the Azure portal or using Azure CLI.
- You can also use Visual Studio. Creating and working with Azure Functions in Visual Studio offers a more integrated development experience, like:
- Edit, build, and execute functions on your local development machine without the necessity of having any Azure resources set up at this stage.
- Deploy your Azure Functions project to Azure and automatically generate Azure resources as required.
- Declare function bindings directly in your C# code using C# attributes.
- Develop and deploy C# functions that are pre-compiled, offering superior cold-start performance when compared to C# script-based functions.
- Enjoy the benefits of Visual Studio development while coding your functions in C#.
At the time I’m writing this blog post, and in order to have .NET 6.0 long-term support, we need to use Visual Studio 2022 to run Azure Functions locally.
Setting up the environment to run Azure Functions locally
To run Azure Functions locally, we need to install the following pre-requirements in our environment:
- Install Visual Studio 2022 – Make sure to select the Azure development workload during installation.
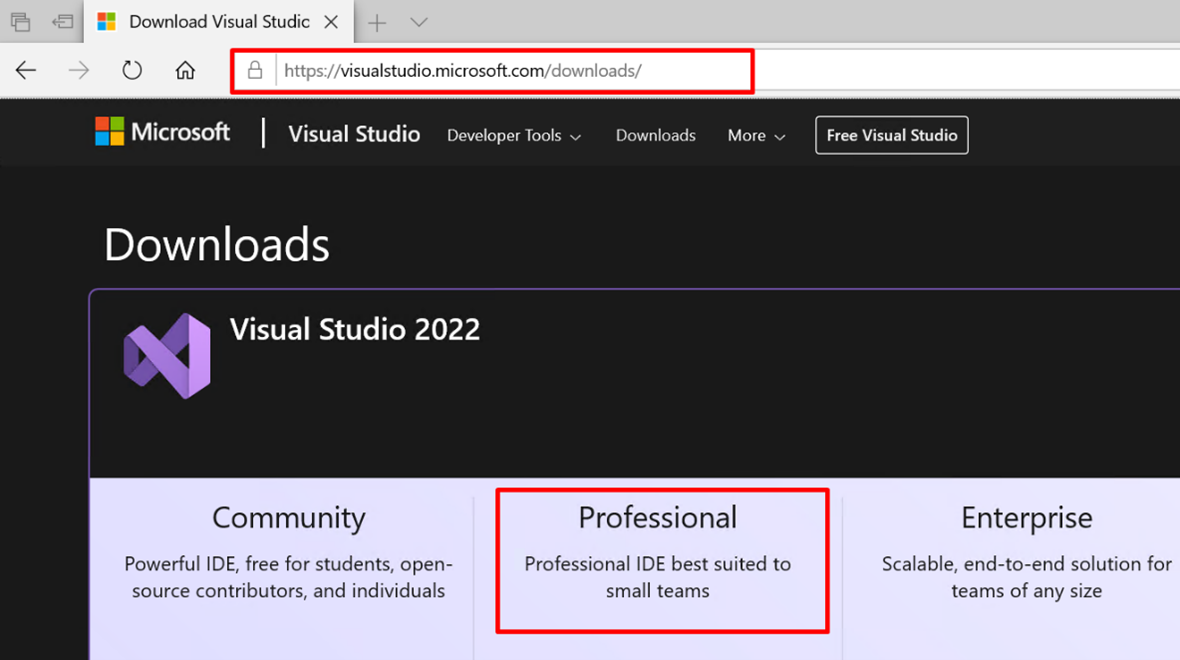
- Download the Visual Studio bootstrapper file here.
-
- Choose the edition of Visual Studio you want, then click Free Trial.

-
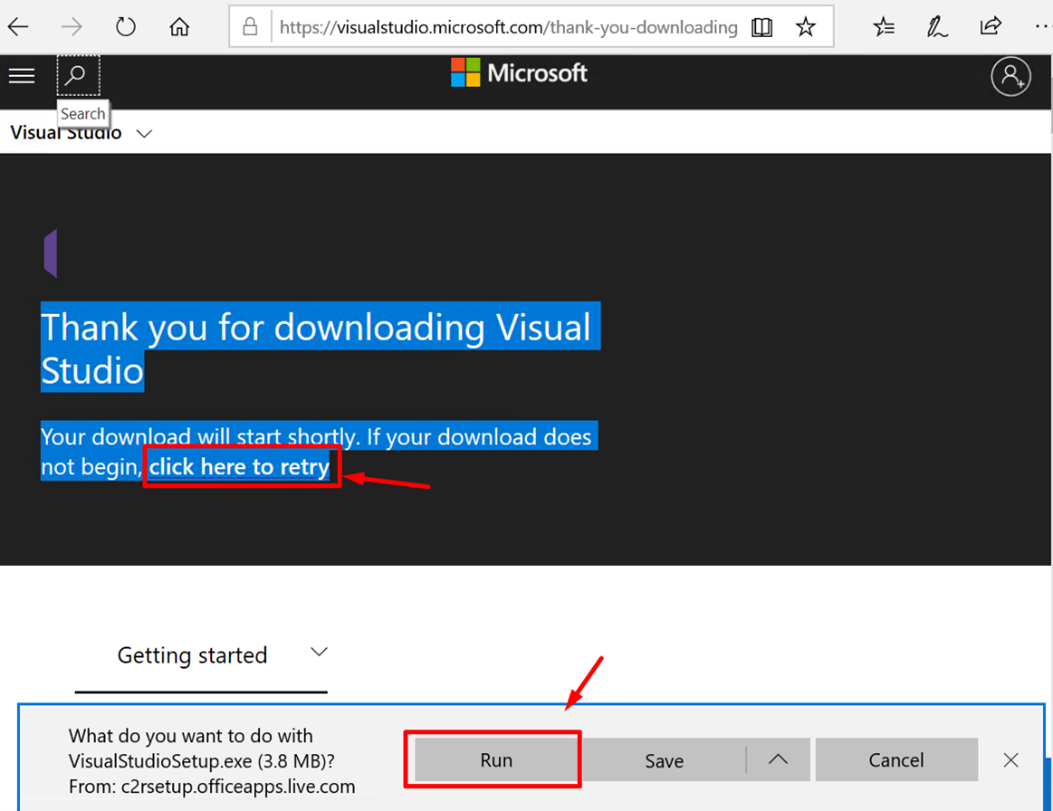
- A new page will open. Wait for the download to start. If it does not start by itself, click where we reference the image (click here to retry), and click on Run.
-
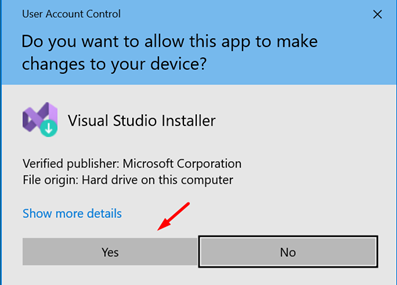
- Depending on the security settings of your machine, a new screen will open asking you if you want to allow this app to make changes on your device; click on Yes to continue.
-
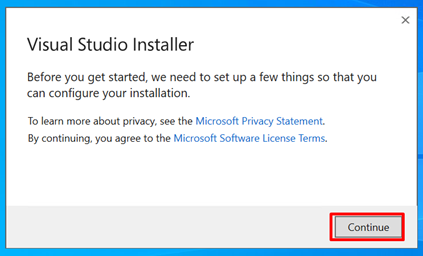
- On the Visual Studio Installer window, click on Continue and wait for the Visual Studio Installer to finish.
-
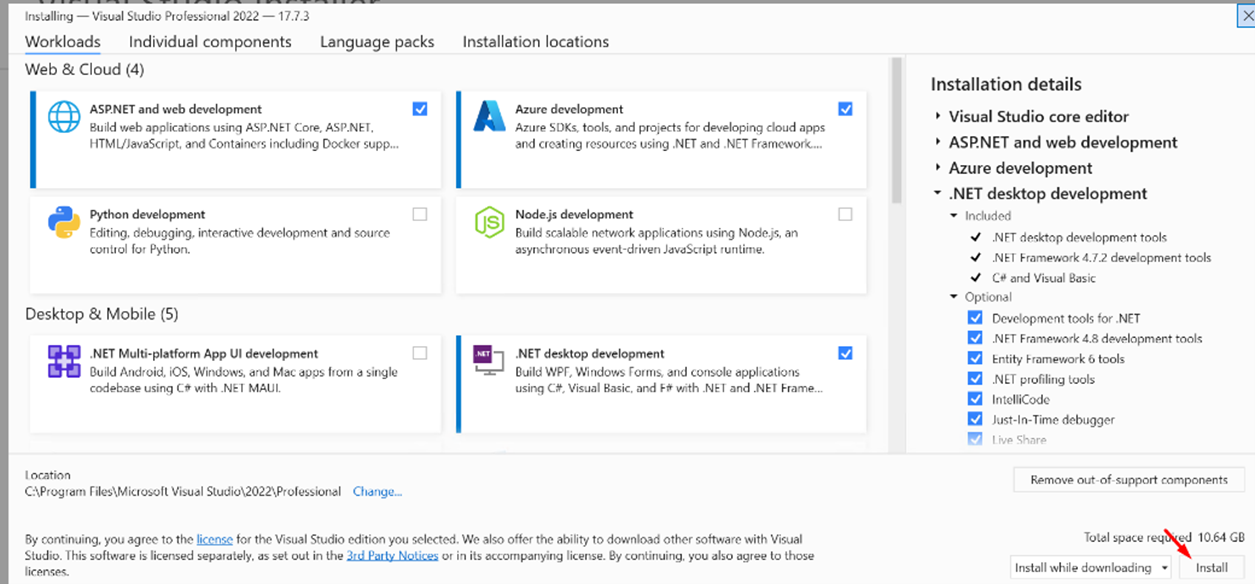
- Upon completion the installer installation, you’re free to customize your setup by hand-picking the feature sets or workloads you wish to include.
- Select the following workloads, but you can add more according to your needs:
- .NET desktop development: Essential for building WPF, Windows Forms, and console applications using C#, Visual Basic, and F# on both .NET Core and .NET.
- ASP.NET and web development: Indispensable when it comes to building web applications using ASP.NET Core, ASP.NET, HTML/JavaScript, and Containers, along with Docker support.
- Azure development (required): The installation of the Azure SDK, tools, and projects is mandatory for developing cloud applications and setting up resources with .NET Core and .NET.
- And then click on Install.
-
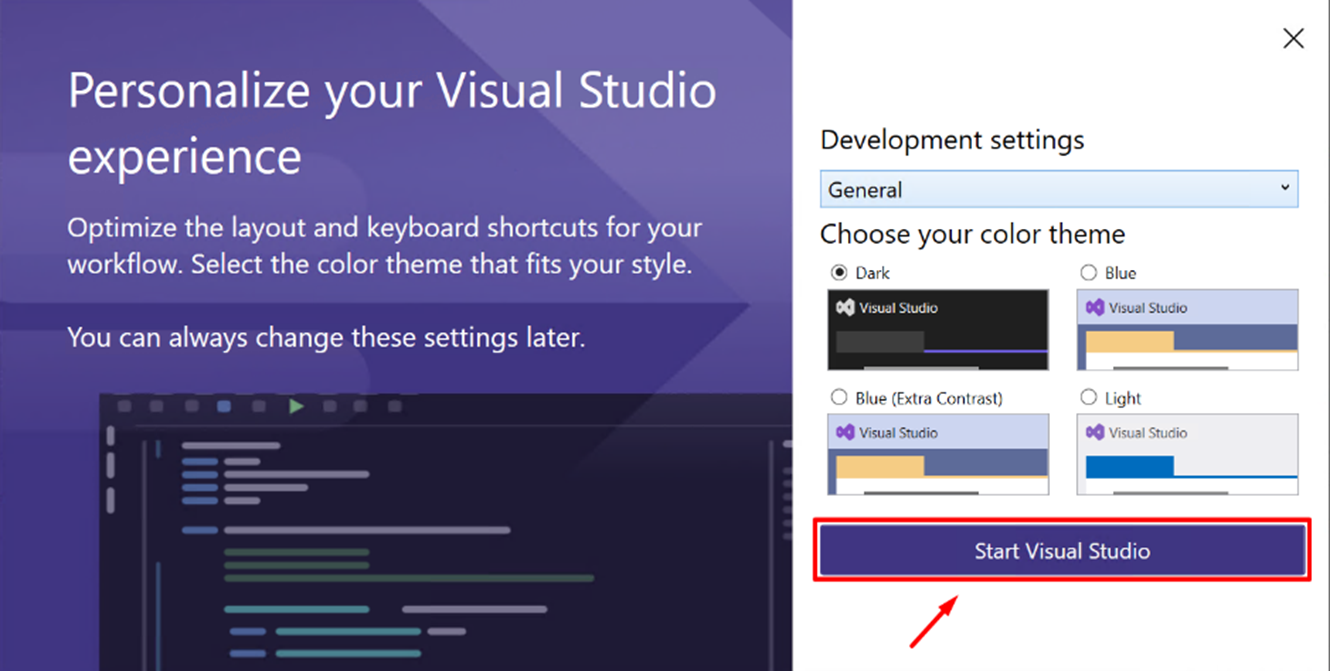
- After the installation is complete, you can make some general customization and click Start Visual Studio.
- There is no obligation to run the Azure Function locally, but if you plan to publish them to Azure and currently lack an Azure subscription, you have the option to create a free Azure account before you get started.
Running Azure Functions locally in Visual Studio 2022
To run Azure Function locally, we must open our Azure Function Visual Studio project. Otherwise, if you don’t have one, we need to create a new Azure Function project. To create the Azure Function project using Visual Studio, we need to:
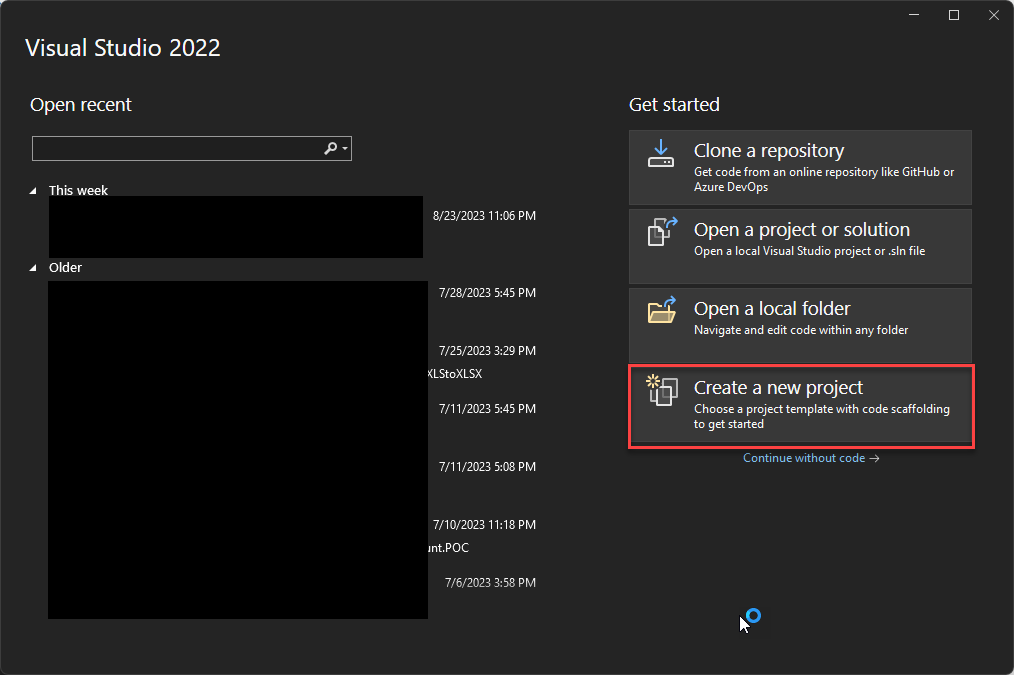
- Open Visual Studio 2022 and choose the Create a new project option.
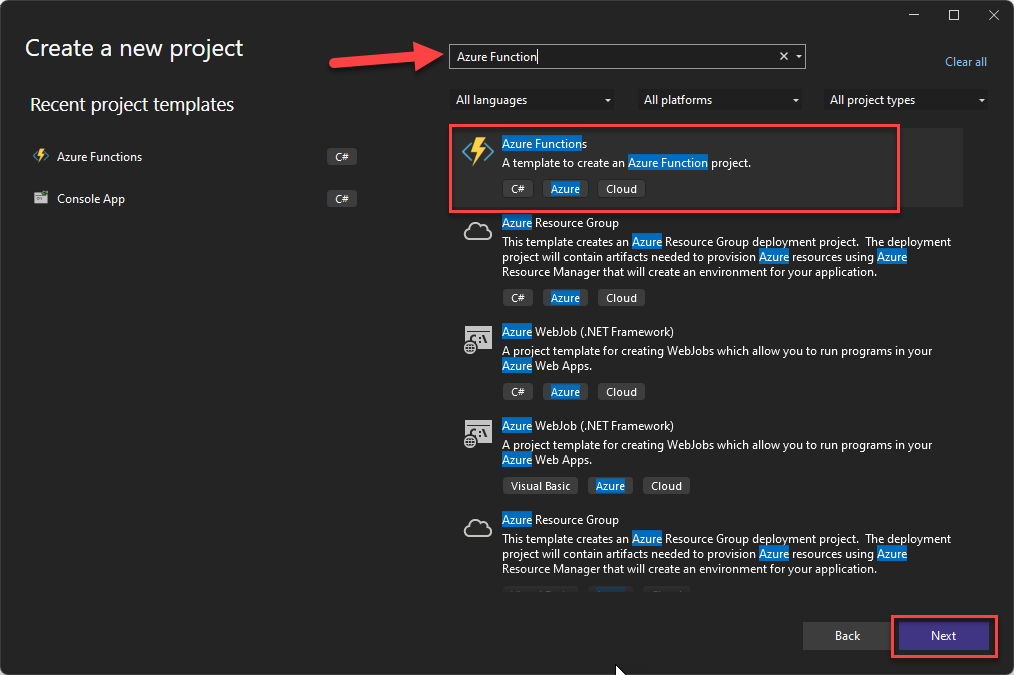
- On the Create a new project page, select the Azure Function template, and from the list, choose Azure Functions and click Next.
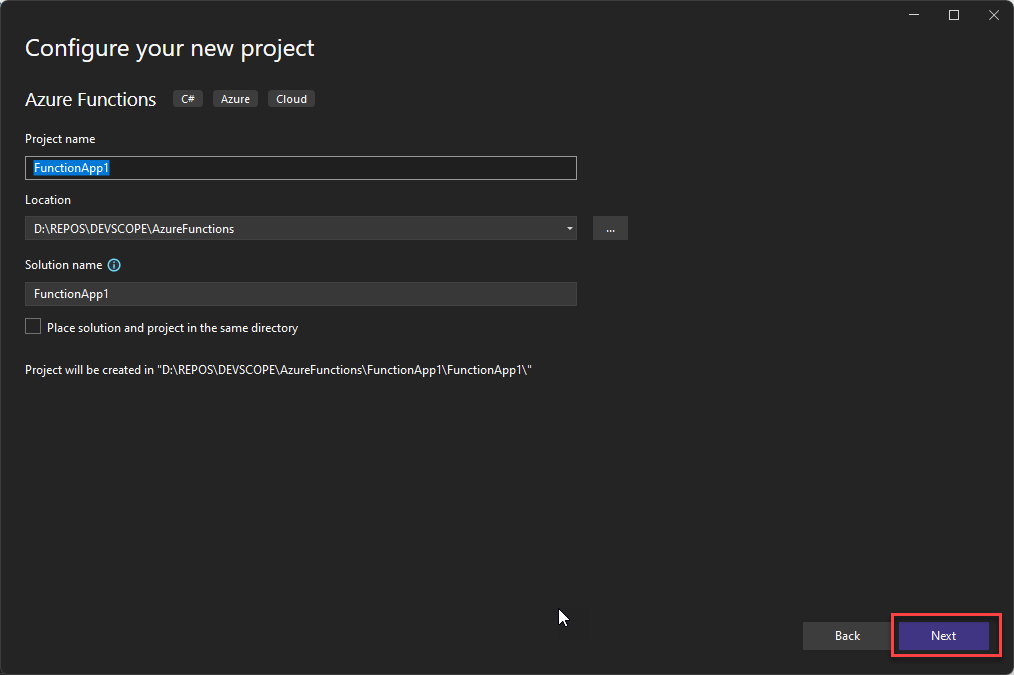
- Within the Configure your new project panel, provide your Azure Function with a name that’s intuitive for both you and your team. It’s crucial to adopt appropriate naming conventions from day one! Additionally, specify the location for your Azure Function.
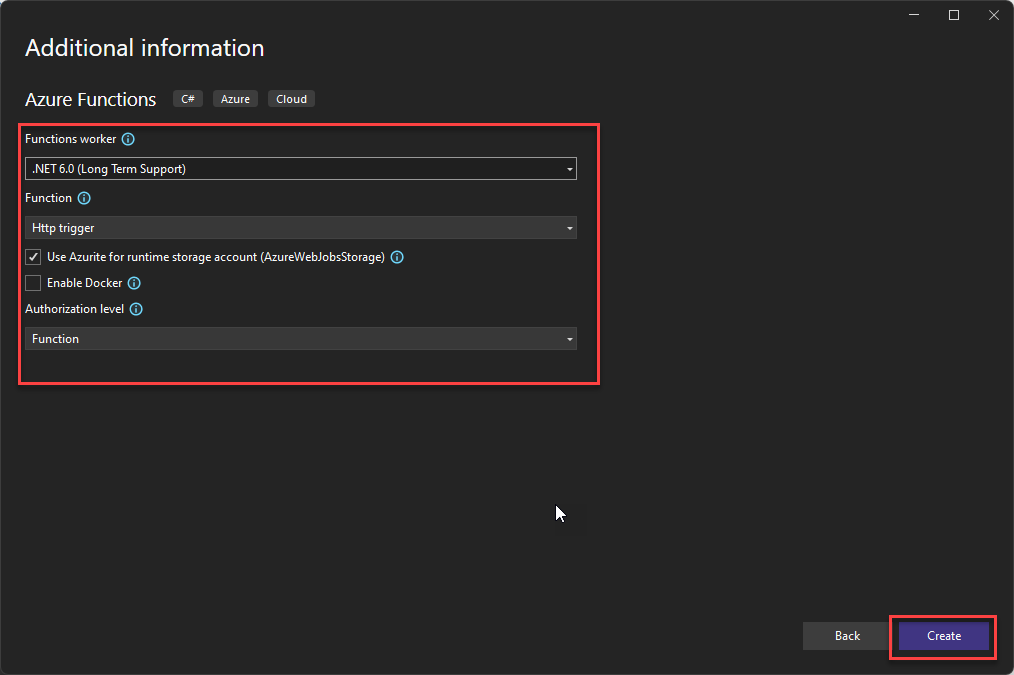
- Proceed by clicking Next, and on the Additional information panel, you’ll be required to configure certain fields:
- On the Function worker property, pick .NET 6.0 (Long Term Support).
- On Functionproperty, select the Http trigger, for example.
- Make sure you select Use Azurite for runtime storage account (AzureWebJobsStorage), this option is needed to run our function locally.
- And Set the Authorization level to Function.
- Of course, these settings can change depending on the function trigger you select.
- Proceed by clicking Create, and upon project creation, apply the code provided:
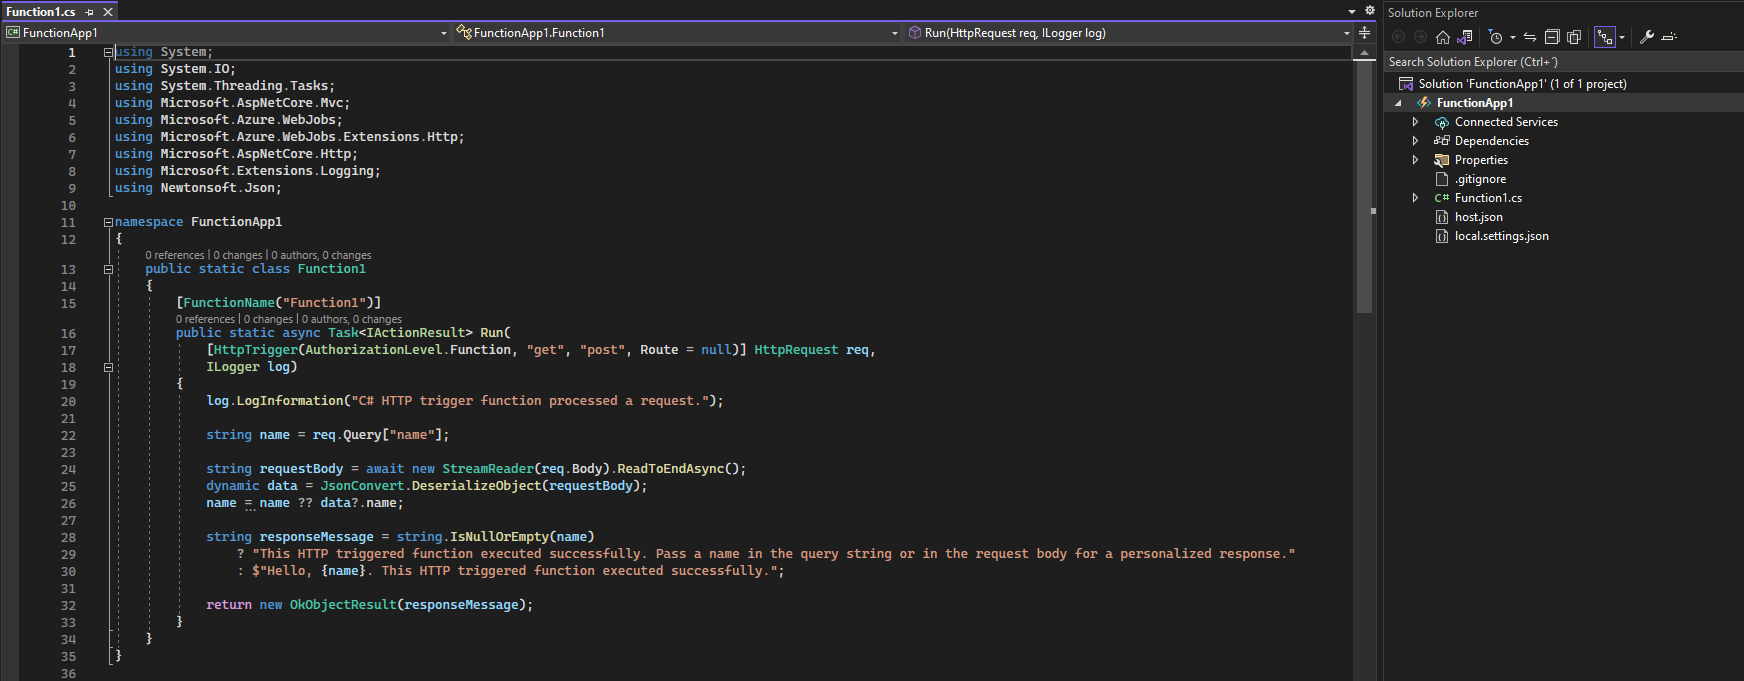
- Make the necessary changes to your Azure Function code.
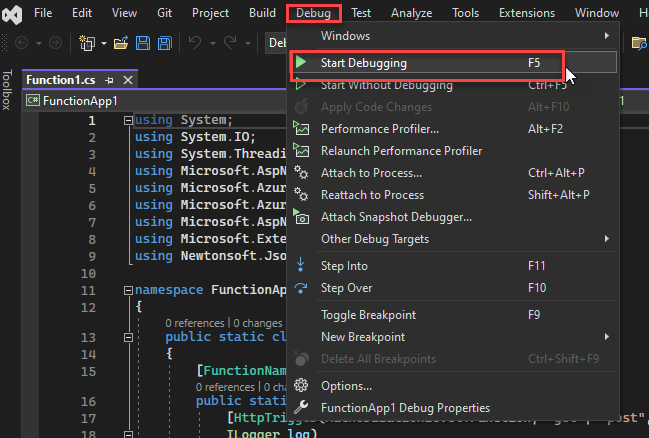
- Once the changes are done, you can test and run your Azure Function locally on your machine. To do that:
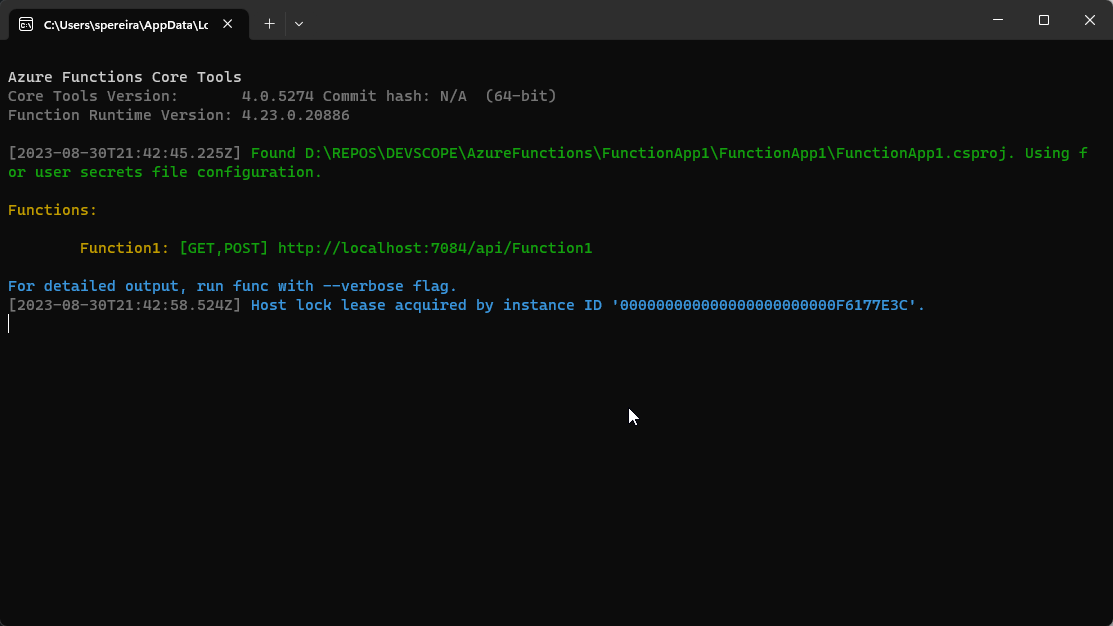
- On the top menu of Visual Studio, select the option Debug > Start Debugging or simply press F5.
-
- This action starts the Azure Functions runtime locally. If a Windows Defender Firewall appears, configure the necessary allow func to communicate options and click Allow access.

-
- For example, if we have created an Azure Function triggered by HTTP, then your functions will be available at http://localhost:port/function-name.
-
- We then can invoke them using, for example, Postman.
Deploying Azure Function to Azure
Once you’ve successfully tested your function on your local environment, the next step is deploying it to Azure. This involves the creation of an Azure Function App and publishing your local code to it. You can achieve this by:
- Creating everything that is required in Azure directly inside Visual Studio and then deploying the solution.
- Another option is to create an Azure Function App and, if required, a Resource group via the Azure Portal. You can then proceed to deploy the solution using Visual Studio.
Personally, I prefer the second option. So, to accomplish that, we need to:
- Create an Azure Function App.
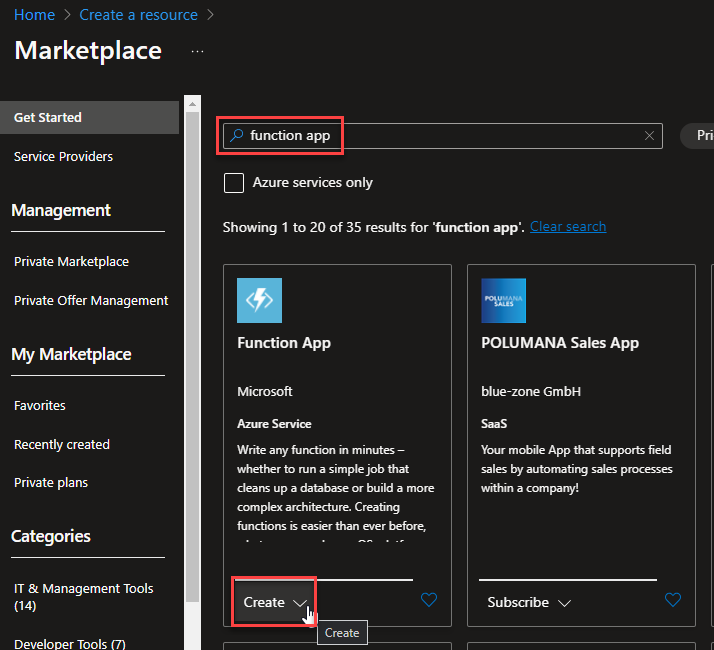
- Choose Create a resource from either the Azure portal menu or the Home page.
- On the Create a resource page, search for Function App, and from the result list, click Create under the Function App panel.
-
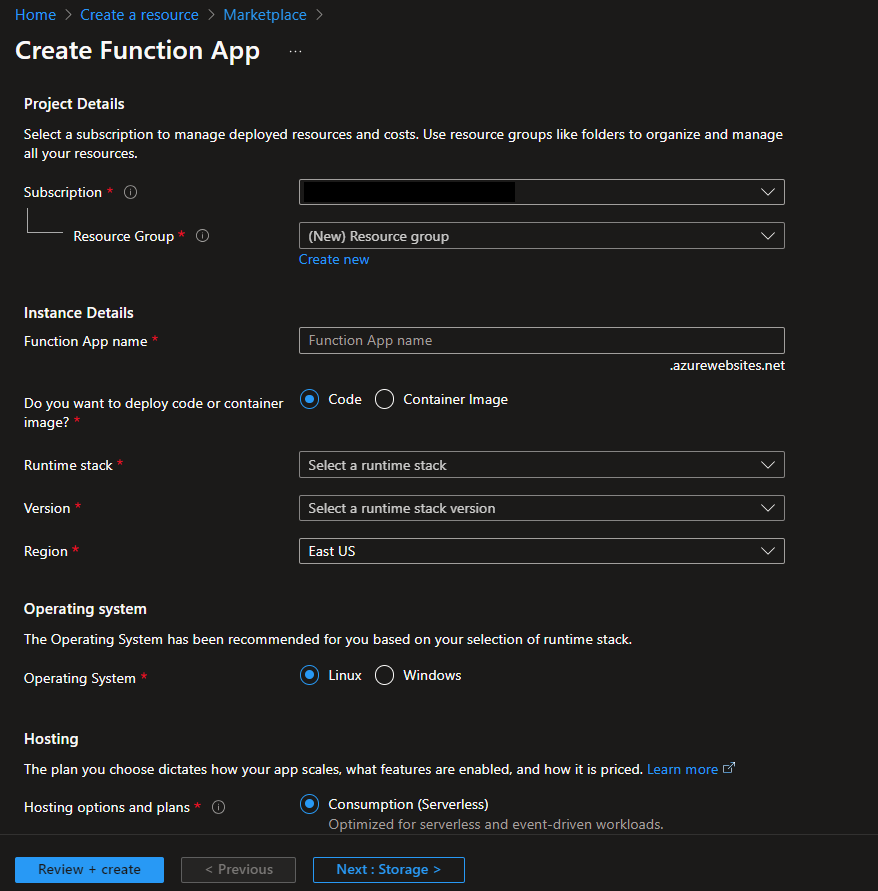
- On the Basics page, specify the following settings:
- Subscription: The subscription you use to create your new function app.
- Resource Group: Provide a name for an existing resource group where you’ll create your function app, or create a new resource group.
- Function App name: Select a name to identify your newly created function app. Acceptable characters include a-z (not case-sensitive), 0-9, and -.
- Do you want to deploy code or container image?: Choose between publishing code files or a Docker container.
- Runtime stack: Opt for a runtime that is compatible with the function programming language you prefer.
- Version: Select the installed runtime version of your choice.
- Region: Choose a region that’s either in proximity to your location or close to other services that your functions may need to access.
- Operating system: The operating system is automatically chosen for you according to your runtime stack selection, but you have the option to modify this configuration if needed.
- Hosting options and plans: Hosting plan that defines how resources are allocated to your function app.
- On the Basics page, specify the following settings:
-
- Proceed by accepting the default options on the subsequent pages, and when you’re ready, hit Review + create to review your selected app configuration. Finally, click Create to begin provisioning and deploying the function app.
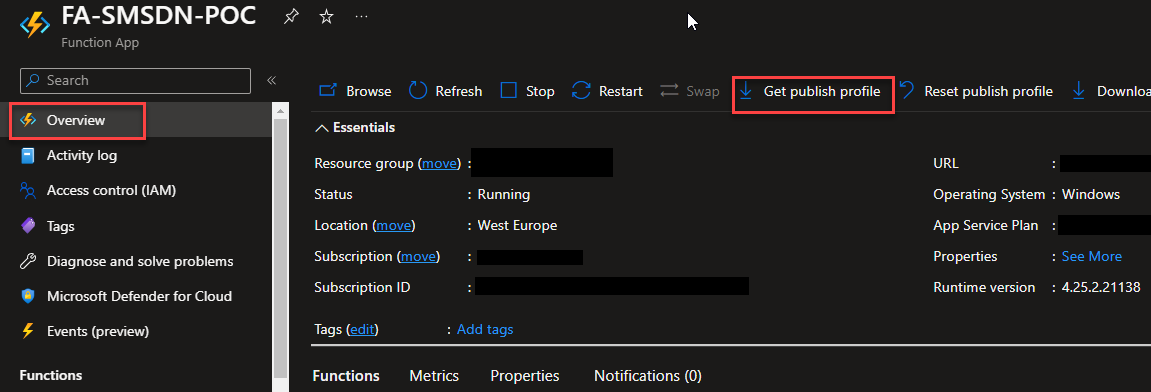
- Once the Function App is created on the Azure Portal, go to the resource and click Get publish profile on the Overview page. This will download a Publish Settings file that we will use inside Visual Studio to deploy our solution.
- Publish from Visual Studio.
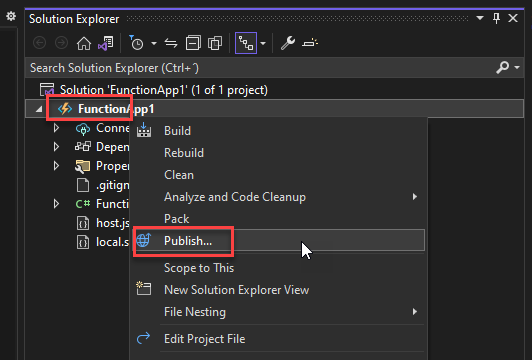
- Once the Function App is created on the Azure Portal and you have downloaded the Publish Settings file inside our Azure Function Visual Studio Project, right-click your project and select the Publish option from the menu.
-
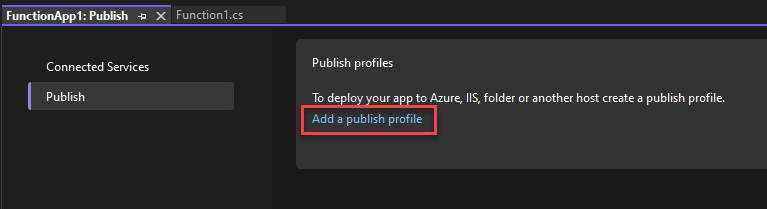
- From the Publish panel, select Add a publish profile.
-
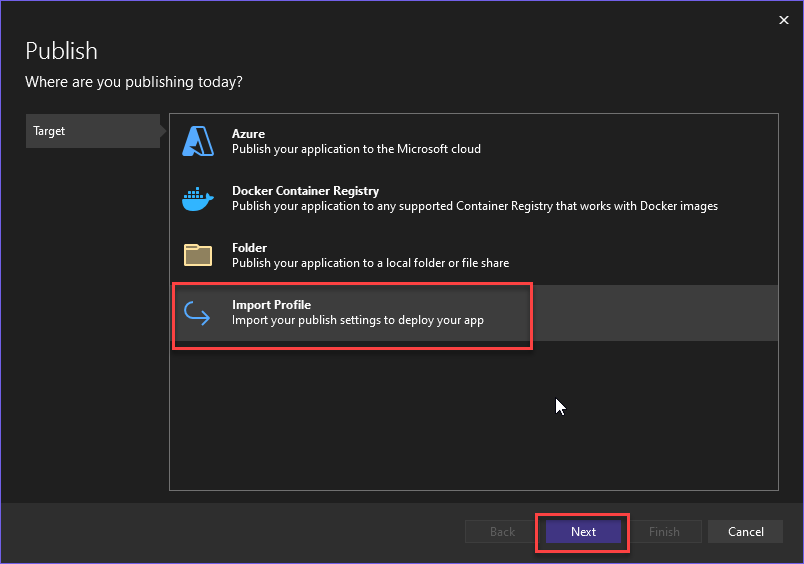
- From the Publish – Where are you publishing today? window, select the Import Profile option and click Next.
-
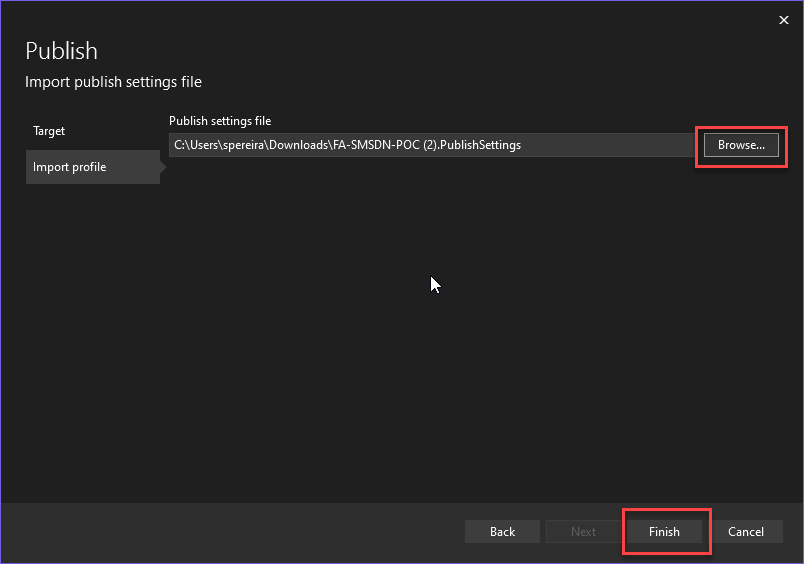
- From the Publish – Import publish settings file window, browse to the Publish Settings file we downloaded previously, and click Finish.
-
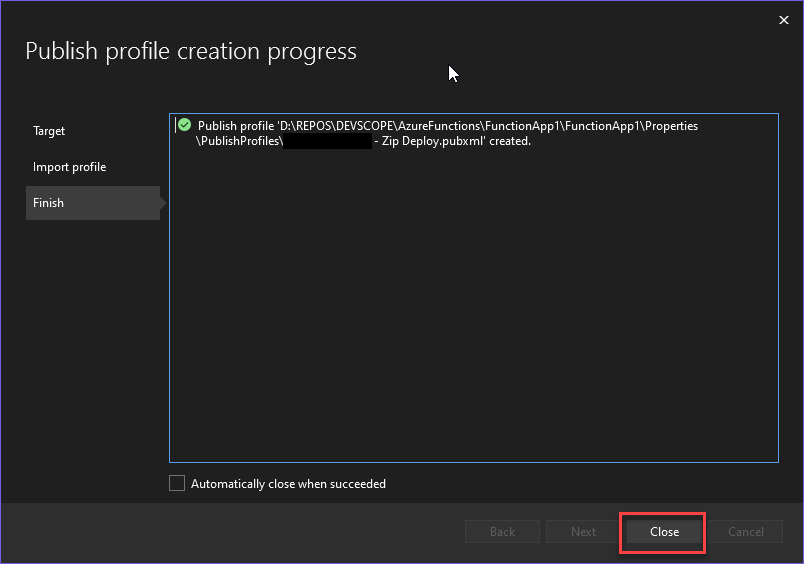
- On the Publish profile creation progress window, click Close.
-
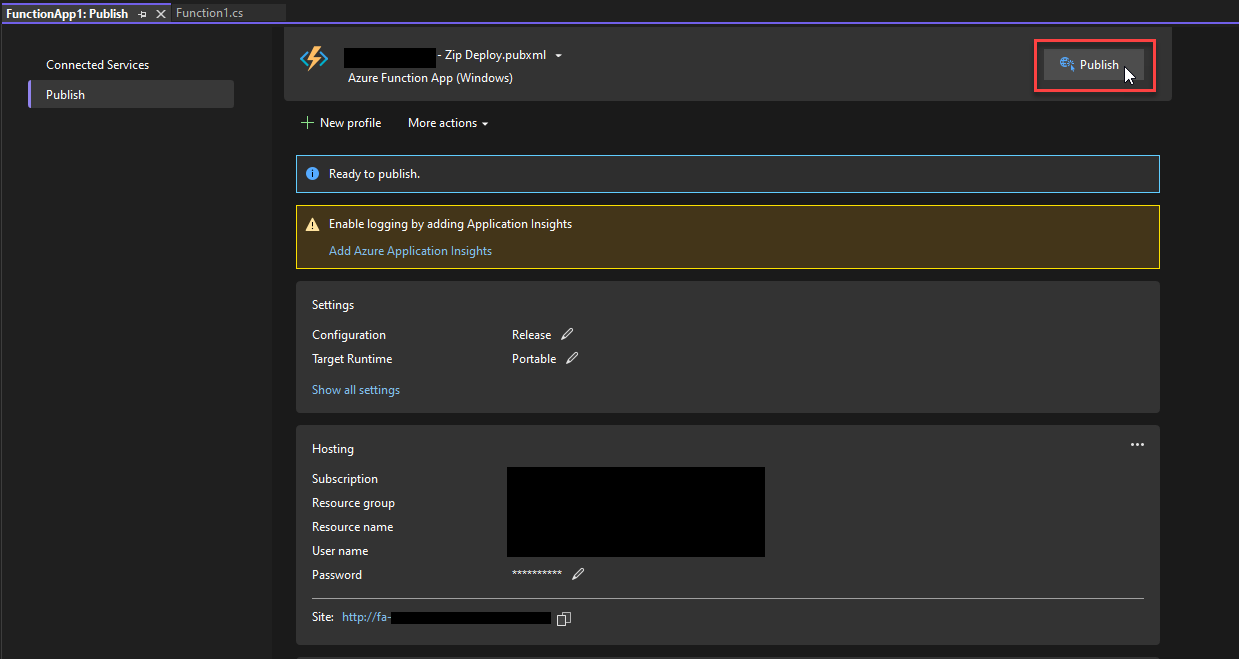
- Now that we have successfully imported the publish profile, click on Publish to deploy our Function to Azure.
Visual Studio will package and deploy your function code to Azure.
Benefits of running Azure Function locally
These are some of the benefits of developing and running our Azure Function locally:
- Simple and faster development: Running functions locally within Visual Studio accelerates your development cycle. You can quickly test and recode without waiting for Azure deployments. We can also have the ability to connect to live Azure services during local development.
- Better debugging experience: Utilizing Visual Studio, you can access a powerful debugging experience that permits breakpoint configuration and seamlessly navigate through your code.
- Offline development and testing: Local development allows you to work offline and test your functions’ behaviour without relying on an internet connection or Azure resources.
- Cost: If required, we don’t need to pay upfront Azure costs on Azure resources while developing our function.
Conclusion
Running Azure Functions locally in Visual Studio is an excellent approach to improve your development efficiency. Using the debugging tools and local runtime makes it possible to build, test, and recode your functions. Once these functions are thoroughly tested and debugged, deploying them to Azure becomes smoother, leading to a more straightforward transition to production.